
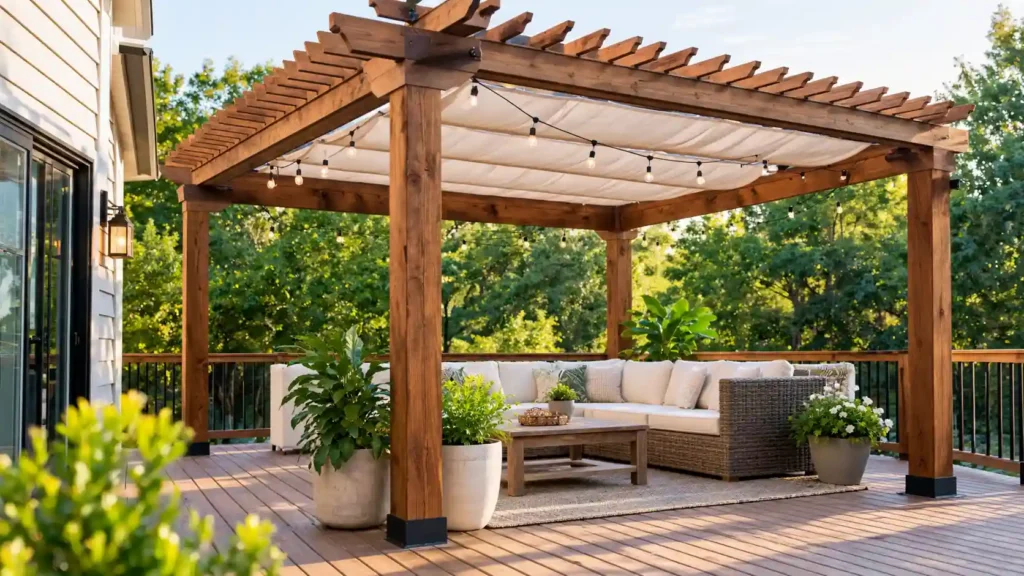
Quick Answer: Can You Add a Pergola to an Existing Deck?
Yes, you can add a pergola to an existing deck, but the deck must be suitable for the additional structure. Before installation, check the condition of the deck, identify where the pergola posts can be structurally supported, and choose an anchoring method that transfers the load into the deck’s framing or an independent footing system.
The most important rule is simple: do not rely on the deck boards alone to support the pergola. The posts need a secure connection to suitable structural members beneath the decking. If the existing deck cannot provide adequate support, reinforcement or independent footings may be necessary.
Check Your Existing Deck Before Adding a Pergola
Inspect the Deck’s Structural Condition
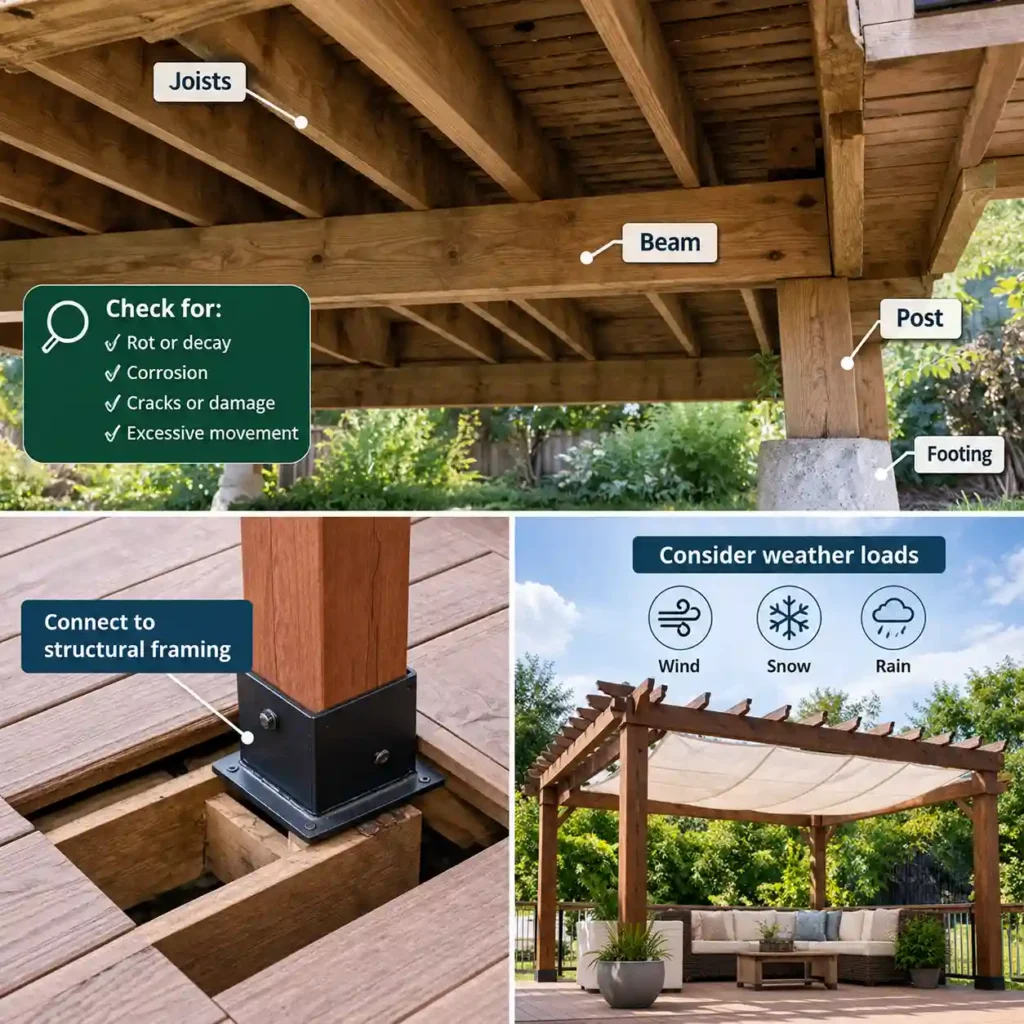
Start by looking below the deck surface rather than focusing only on the boards. Check the condition of the joists, beams, posts, connections, and footings.
Look for signs of rot, decay, corrosion, cracking, excessive movement, or other damage. An existing deck may appear sound from above while its supporting structure has deteriorated.
A pergola adds additional weight and creates forces that the existing deck was not necessarily designed to carry. If the deck is older, elevated, unusually large, or its construction is uncertain, consider getting a qualified professional to assess the structure before installation.
Identify Structural Support Points
Next, determine where the existing joists and beams are located. Your ideal pergola layout may not match the strongest available support points.
Pergola posts should transfer their loads into suitable structural framing rather than simply being fastened to the surface decking. This makes the location of the posts one of the most important decisions to make before purchasing or assembling the pergola.
If the desired post positions do not align with suitable framing, the deck may need additional reinforcement or a different support approach.
Consider Wind, Snow and Other Loads
A pergola creates additional structural demands beyond its own weight. Wind can place lateral and uplift forces on the frame, while snow accumulation may add significant weight in some climates.
The shade system also matters. A solid or poorly secured covering can catch more wind than a breathable or adjustable shade system. For windy locations, consider how the shade material, anchoring method, and overall pergola structure work together. Breathable HDPE shade sails and adjustable louvered systems are examples of approaches designed to manage airflow and wind exposure.[1]
The important point is not to assume that one wind-resistance solution works for every location. Match the structure and shade system to the local weather conditions and manufacturer’s specifications.
Plan the Pergola Around Your Existing Deck
Measure the Available Space
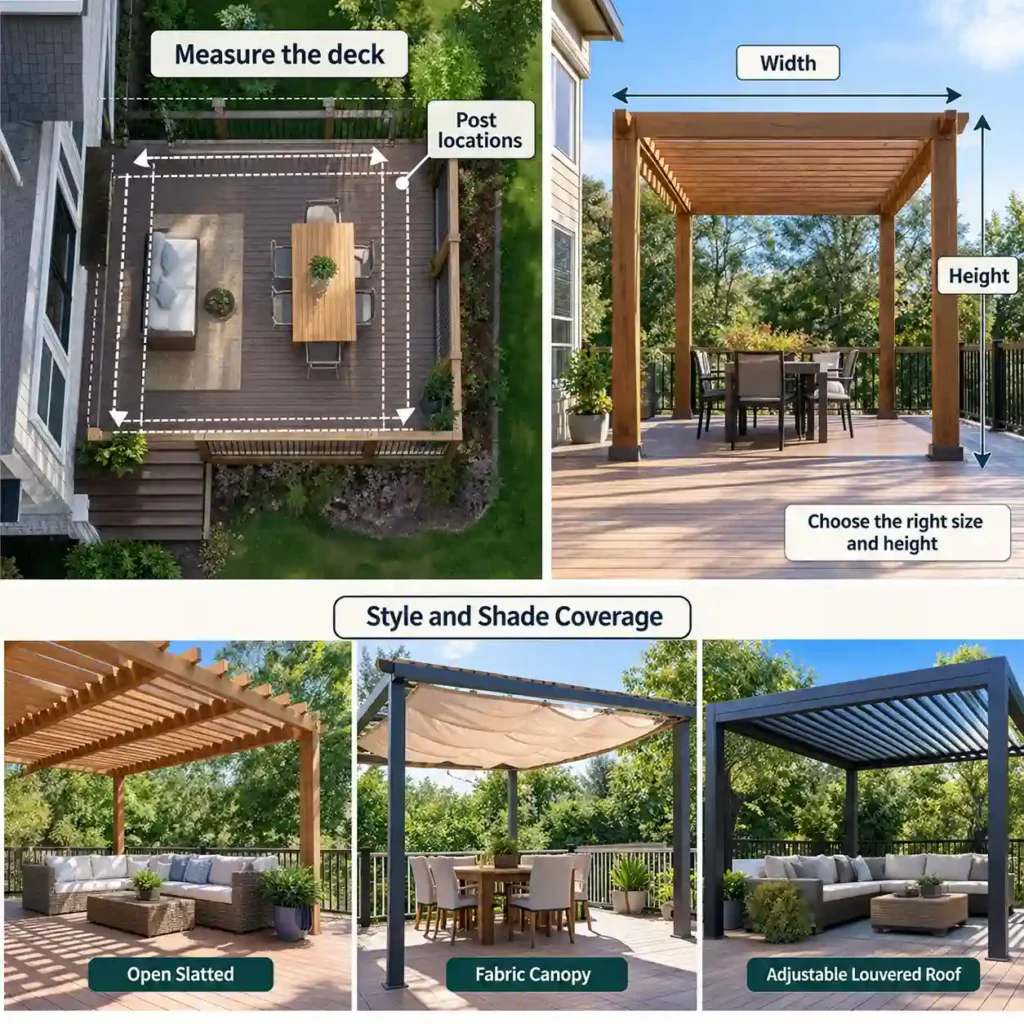
Measure the deck before choosing the pergola size.
Consider:
- The overall deck dimensions
- Proposed post locations
- Stairs and doors
- Railings
- Walking paths
- Existing furniture
- Desired seating or dining area
Leave enough clearance for people to move comfortably around the pergola. A pergola that technically fits the deck may still make the space feel crowded if its posts interfere with traffic or furniture.
Choose the Pergola Size and Height
The right size depends on how you plan to use the space, how much shade you want, and where the deck can provide suitable structural support.
Do not choose the dimensions based only on the furniture underneath. The pergola must also fit the available structural support points.
Height should provide comfortable clearance without creating unnecessary structural or planning complications. If the pergola is close to a property boundary or another structure, check applicable local requirements before finalizing the design.
Choose the Style and Shade Coverage
Once the structural requirements are understood, choose the appearance and shade level that suit your outdoor space.
An open slatted pergola provides filtered shade while maintaining an open feel. A fabric canopy can provide greater sun protection, while an adjustable louvered roof allows you to change the amount of shade.
Remember that adding a roof or substantial shade element can change the way wind acts on the structure, so appearance should not be considered separately from structural performance.
Choose the Right Installation Method
Anchor the Posts to Existing Deck Framing
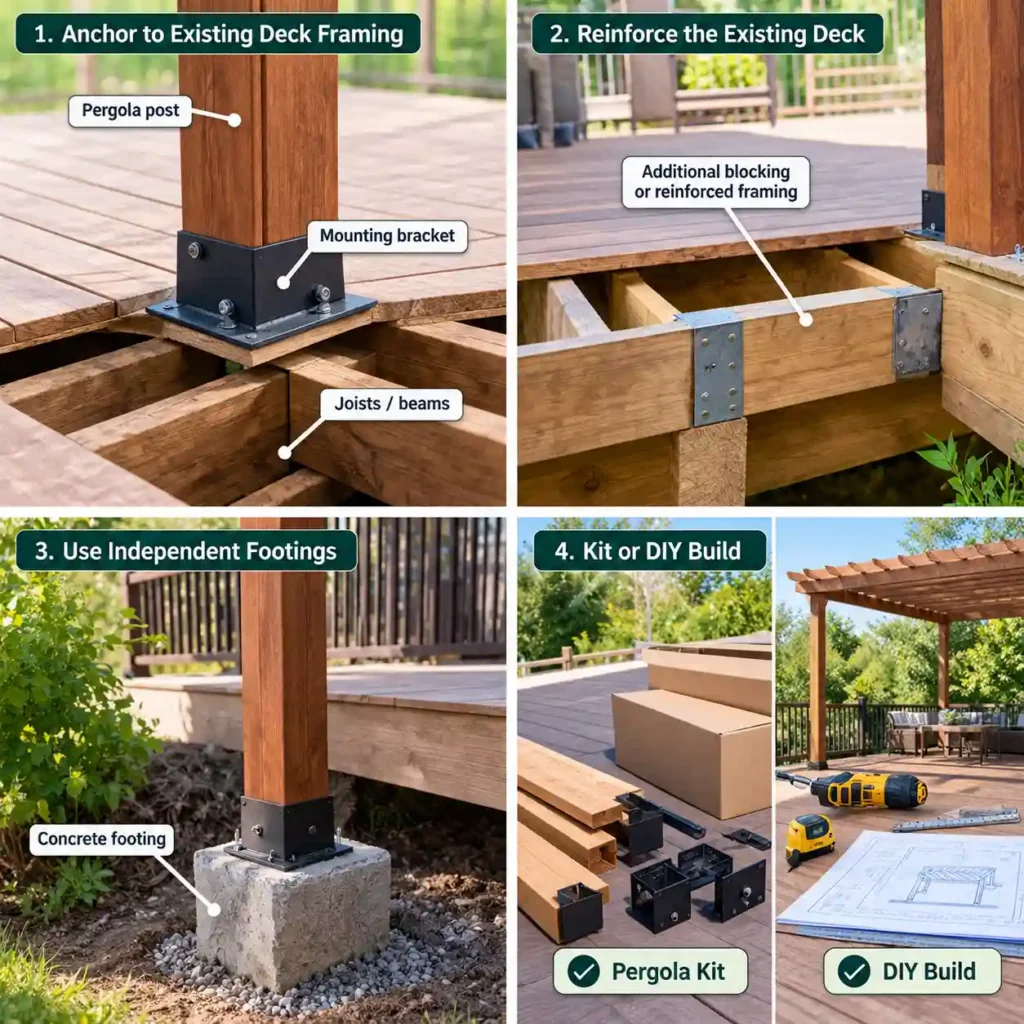
If the deck has suitable structural framing, the pergola posts can be connected to that framing using an appropriate mounting system.
The exact hardware depends on the pergola design and the existing deck construction, but the basic load path should be:
Pergola → Posts → Structural Connection → Joists/Beams/Framing
The connection should not depend solely on the decking boards.
Reinforce the Existing Deck Where Needed
The preferred pergola position may not align with adequate framing. In that situation, additional blocking, reinforced framing, or another structural modification may be required.
Do not assume that one reinforcement method works for every deck. The correct solution depends on the existing joist layout, beam arrangement, pergola dimensions, and expected loads.
Consider Independent Footings
If the existing deck cannot provide suitable support, an independent footing system may be a better solution.
This approach transfers the pergola’s load directly to the ground rather than relying entirely on the existing deck structure.
It can be particularly relevant when the desired pergola position does not correspond with suitable structural framing or when the existing deck was not designed to carry the additional structure.
Choose Between a Pergola Kit and a DIY Build
A pergola kit can simplify the project because the main components are designed to work together and installation instructions are provided.
Building from scratch offers more flexibility over dimensions, materials, and appearance, but requires more planning and construction knowledge.
For most homeowners, the better choice depends on whether installation simplicity or design flexibility is the higher priority.
How to Add a Pergola to an Existing Deck: Step by Step
Step 1 — Measure and Mark the Layout
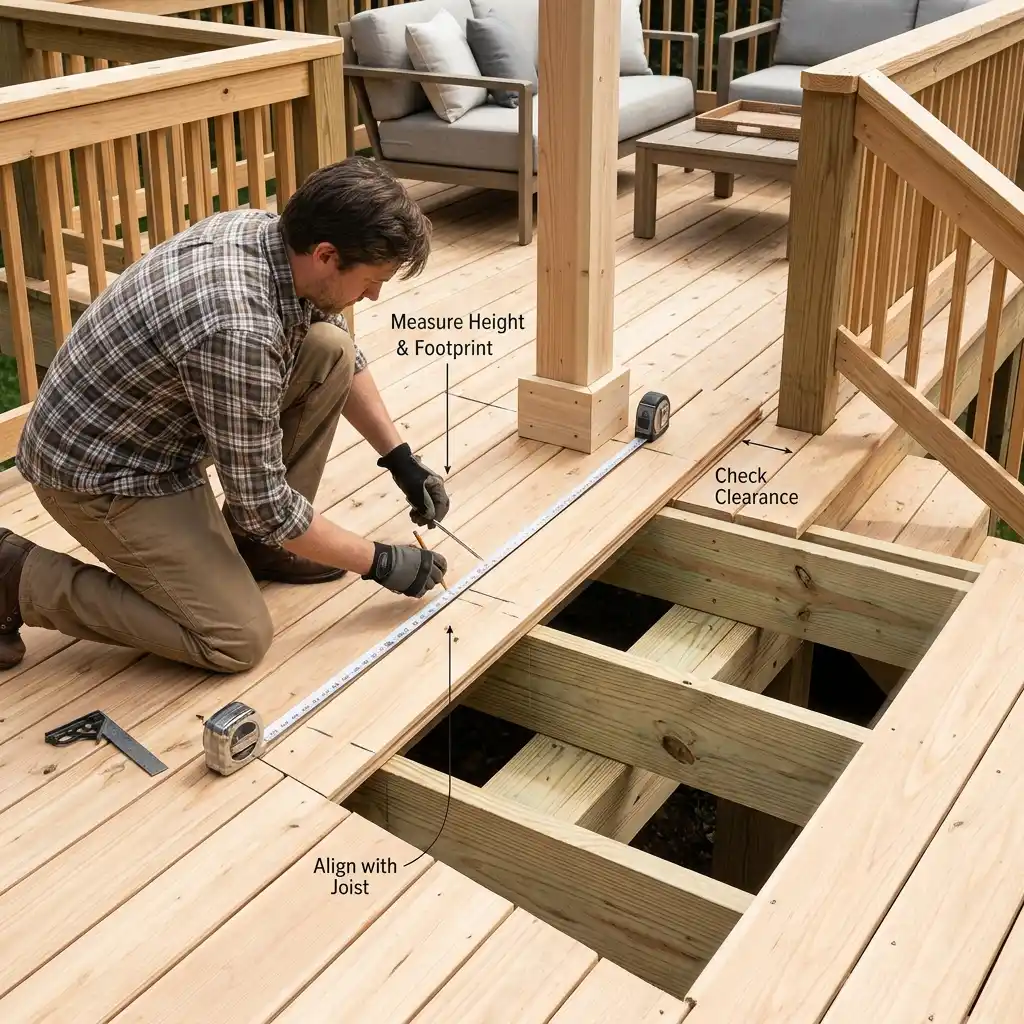
Confirm the pergola footprint and mark the proposed post locations.
Check each position against the deck’s joists, beams, railings, stairs, doors, and furniture. Make sure the planned posts can be connected to appropriate structural support before moving forward.
Step 2 — Prepare the Structural Support
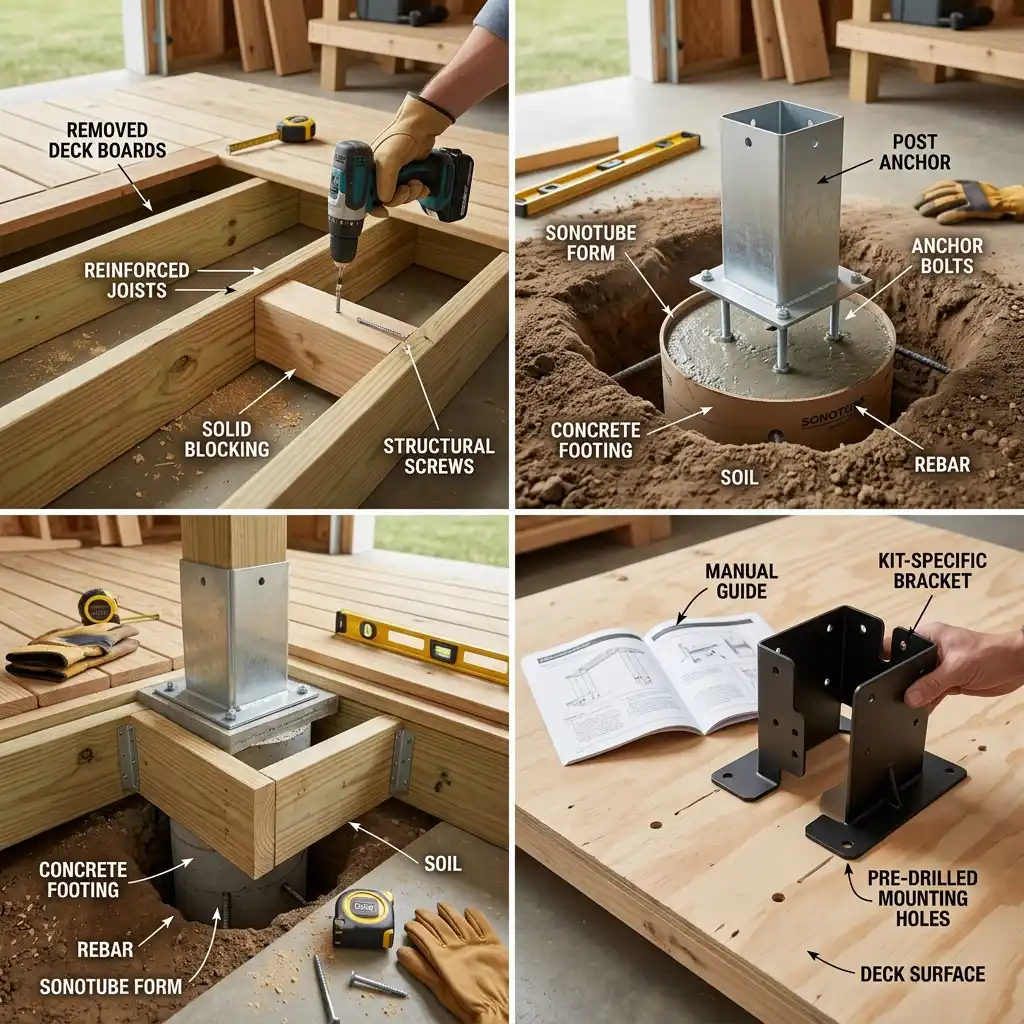
Prepare the areas where the posts will be installed.
Depending on the chosen method, this may involve accessing the framing beneath the deck, adding structural reinforcement, or preparing independent footings.
If you are using a pergola kit, follow its specified mounting requirements rather than modifying the connection without confirming compatibility.
Step 3 — Install and Level the Posts
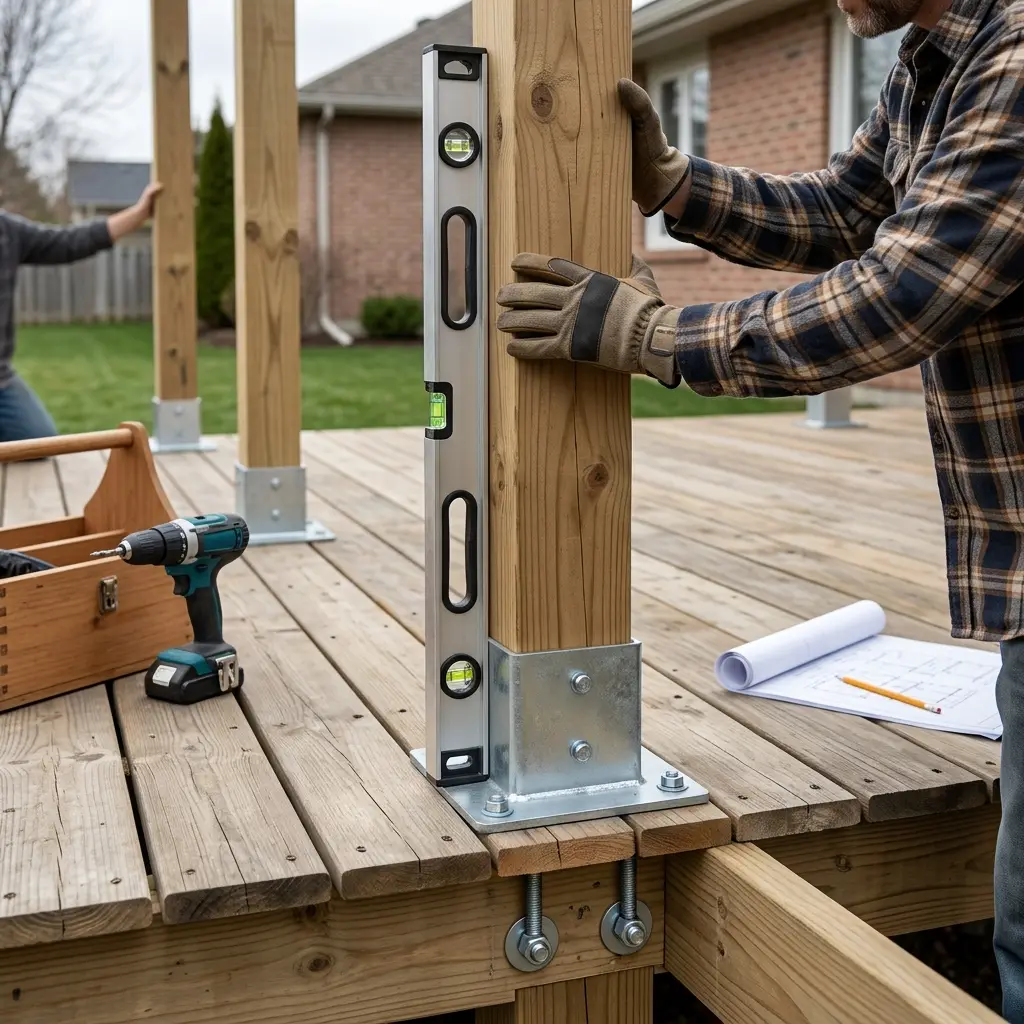
Position the posts according to the planned layout.
Check that each post is vertical and correctly aligned before fully securing it. Use the mounting hardware specified for the pergola and the supporting structure.
At this stage, verify that every connection transfers the load into structural support rather than relying on the deck surface.
Step 4 — Attach the Beams
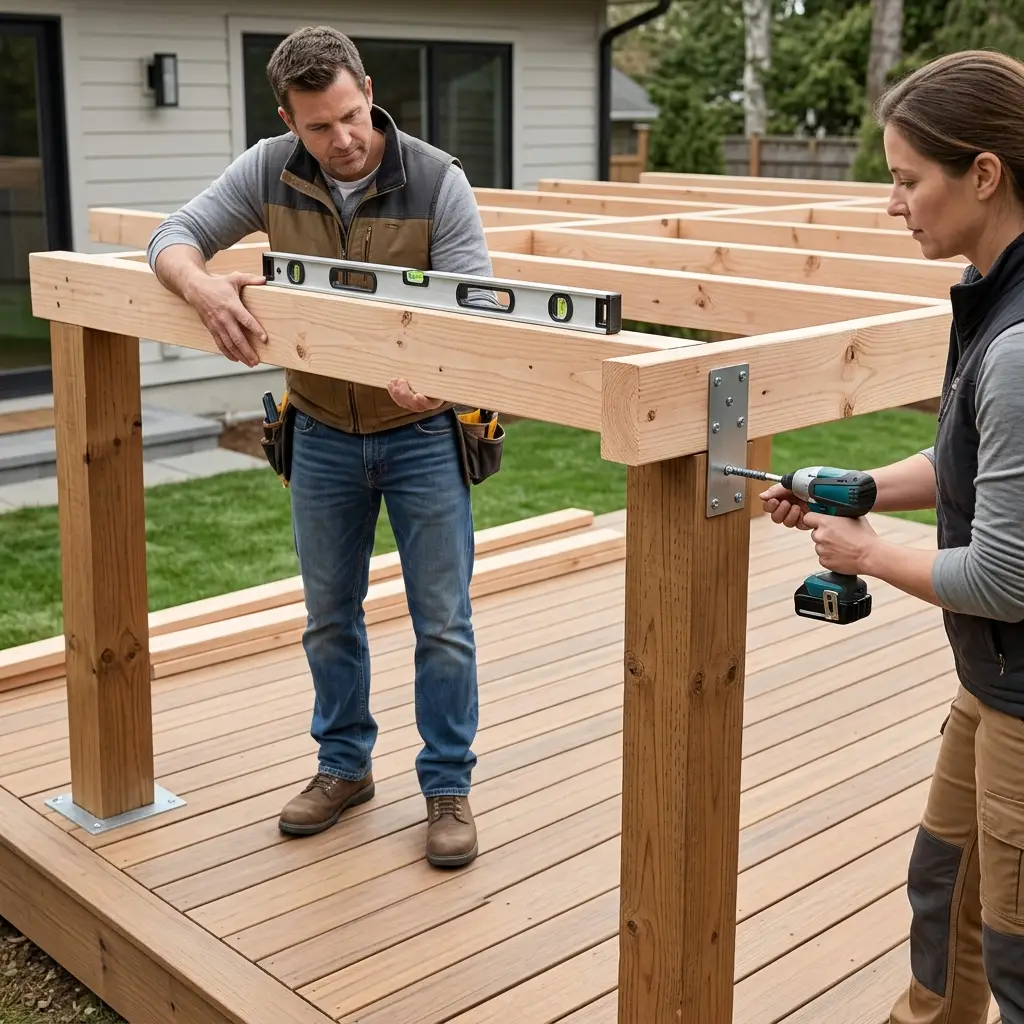
Once the posts are secure, install the main beams that form the upper frame.
Check that the beams are level and properly aligned before continuing. Accurate alignment makes the remaining assembly easier and helps the finished pergola look balanced.
Step 5 — Install the Rafters and Slats
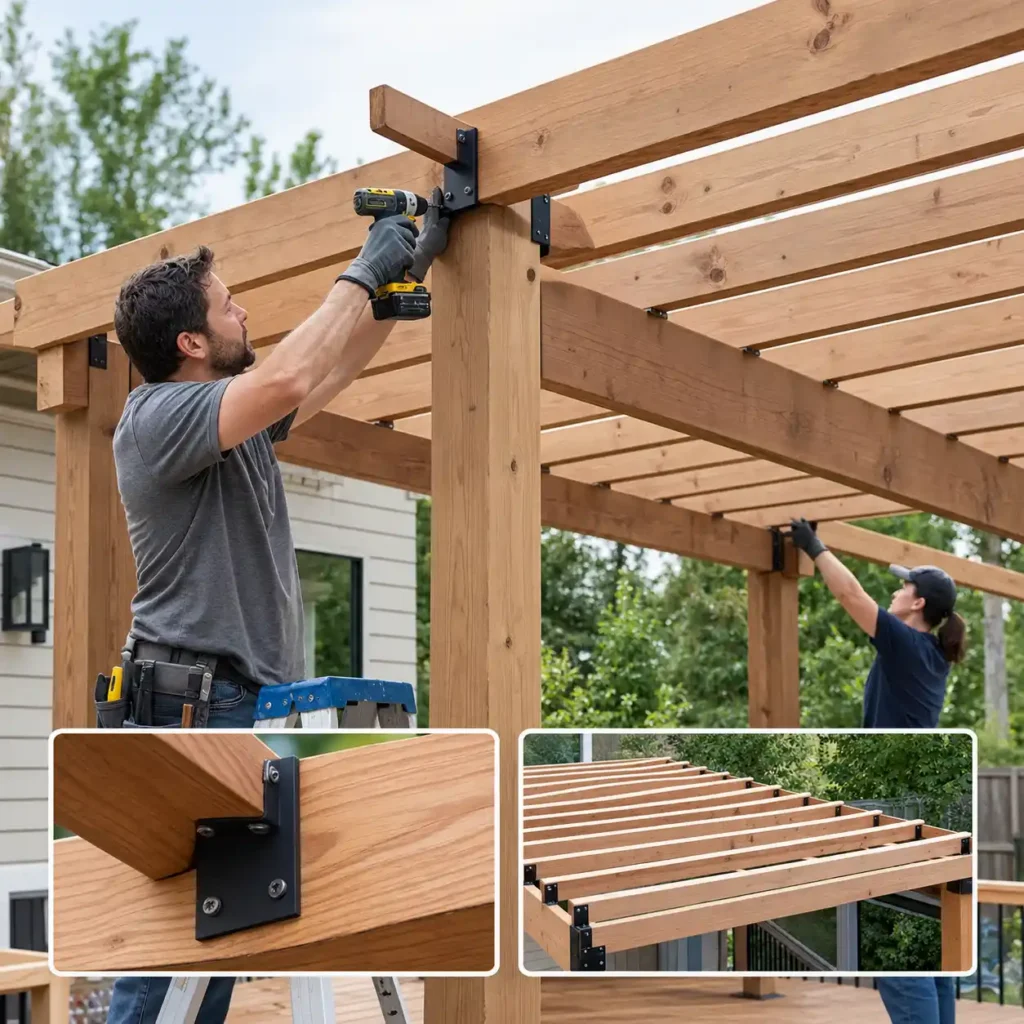
Install the rafters, slats, or other overhead components according to the pergola design.
For a prefabricated kit, follow the manufacturer’s installation sequence. For a custom build, use the planned structural design to determine the appropriate connections and spacing.
Step 6 — Add Bracing and Check Stability
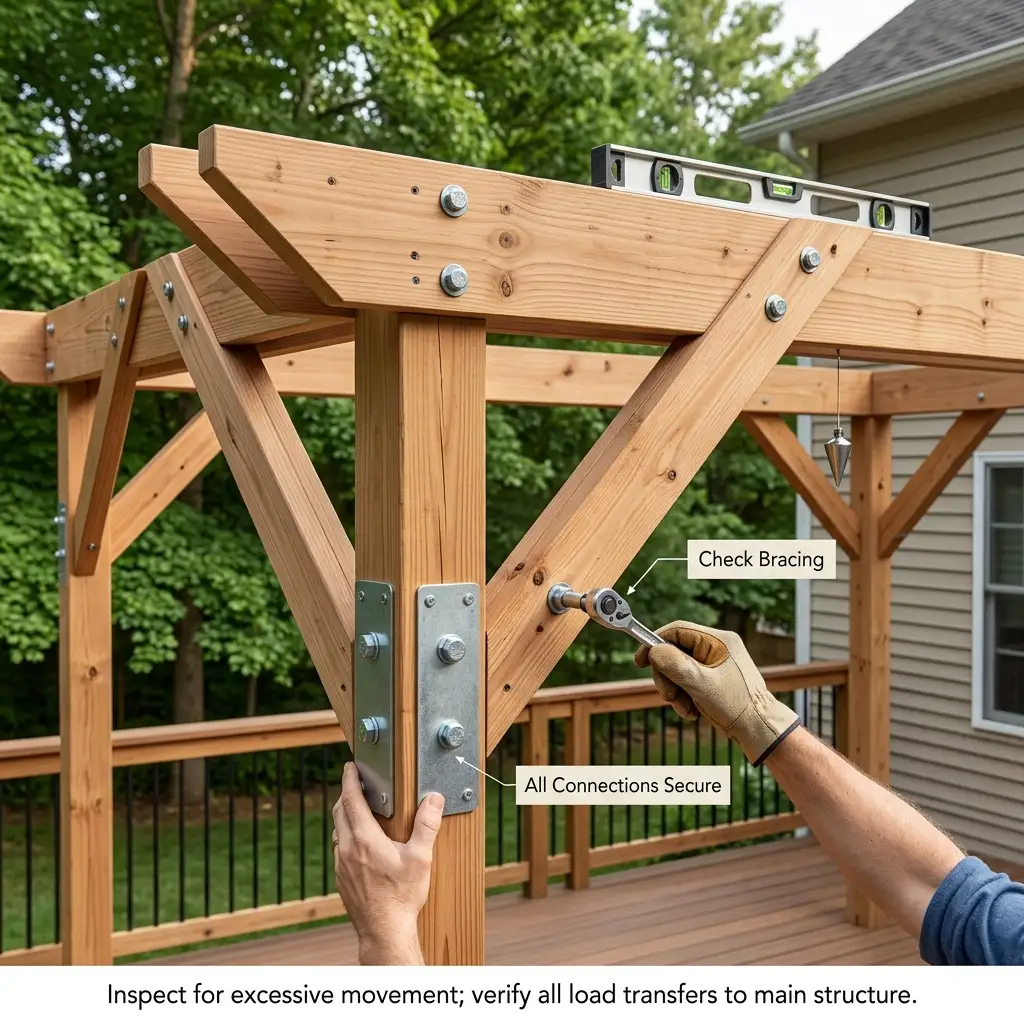
Inspect the completed frame for movement and check all major connections.
Where required, add appropriate bracing to improve lateral stability. The pergola should remain stable without excessive movement, particularly at the connection between the posts and the existing deck.
Step 7 — Apply the Finish
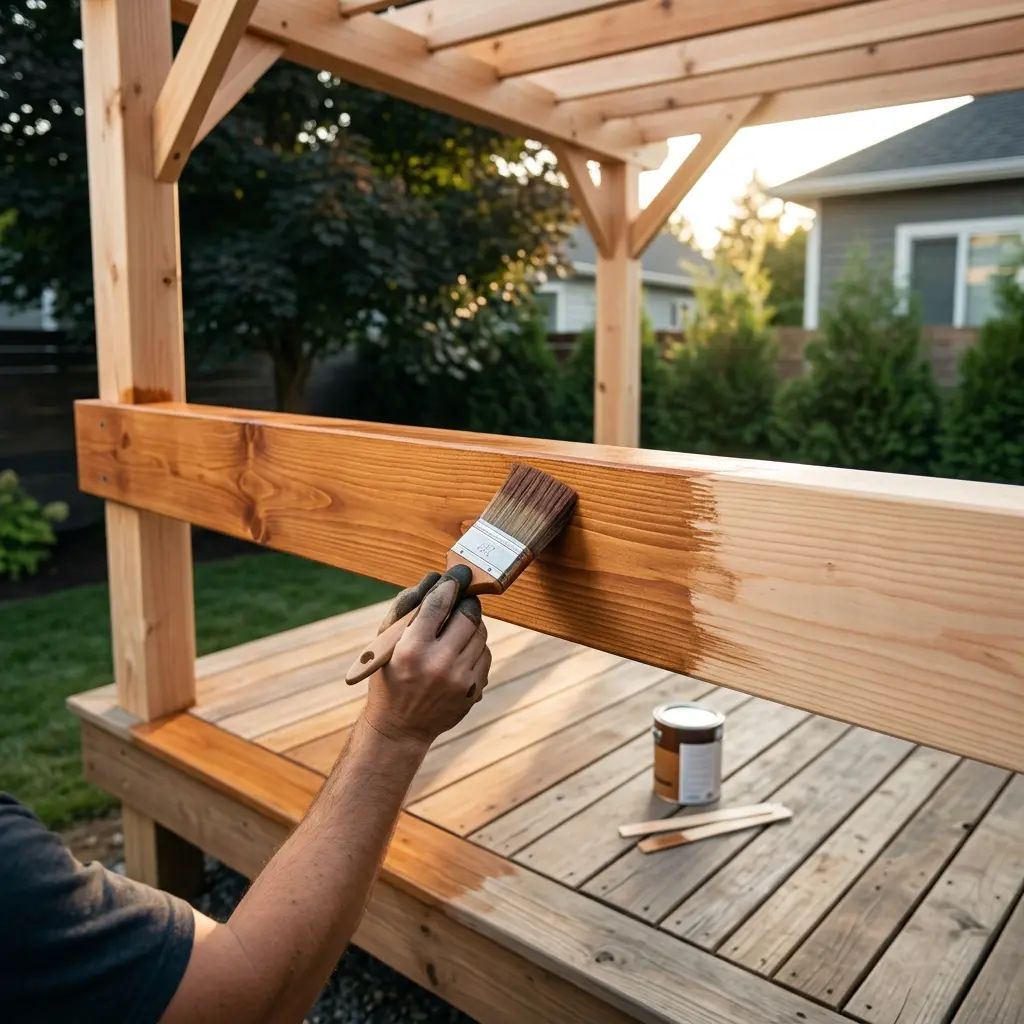
For a wooden pergola, apply an appropriate stain, paint, or protective finish according to the material and manufacturer’s instructions.
Finishing protects the material from outdoor exposure and can also help the new pergola coordinate visually with the existing deck.
Make Your Deck Pergola Safe and Weather-Ready
Secure the Structural Connections
After installation, inspect the post connections, beam connections, and bracing.
Check for movement, loose hardware, or visible damage. Pay particular attention to the points where the pergola transfers its load into the existing deck.
Consider Wind and Weather Exposure
Think about how the pergola will perform under the conditions typical for your location.
Wind exposure, heavy rain, snow, and seasonal weather can all affect the structure and any shade accessories. If you live in a windy area, choose shade components based on their intended wind performance and make sure they are securely anchored.[1]
Check Local Codes and Permits
Permit and building requirements vary by location. Requirements may depend on the pergola’s size, height, location, attachment method, and whether the project changes the existing structure.
Check with your local planning or building authority before construction rather than assuming that a pergola is automatically exempt from approval requirements.
Customize the Pergola for Your Outdoor Space
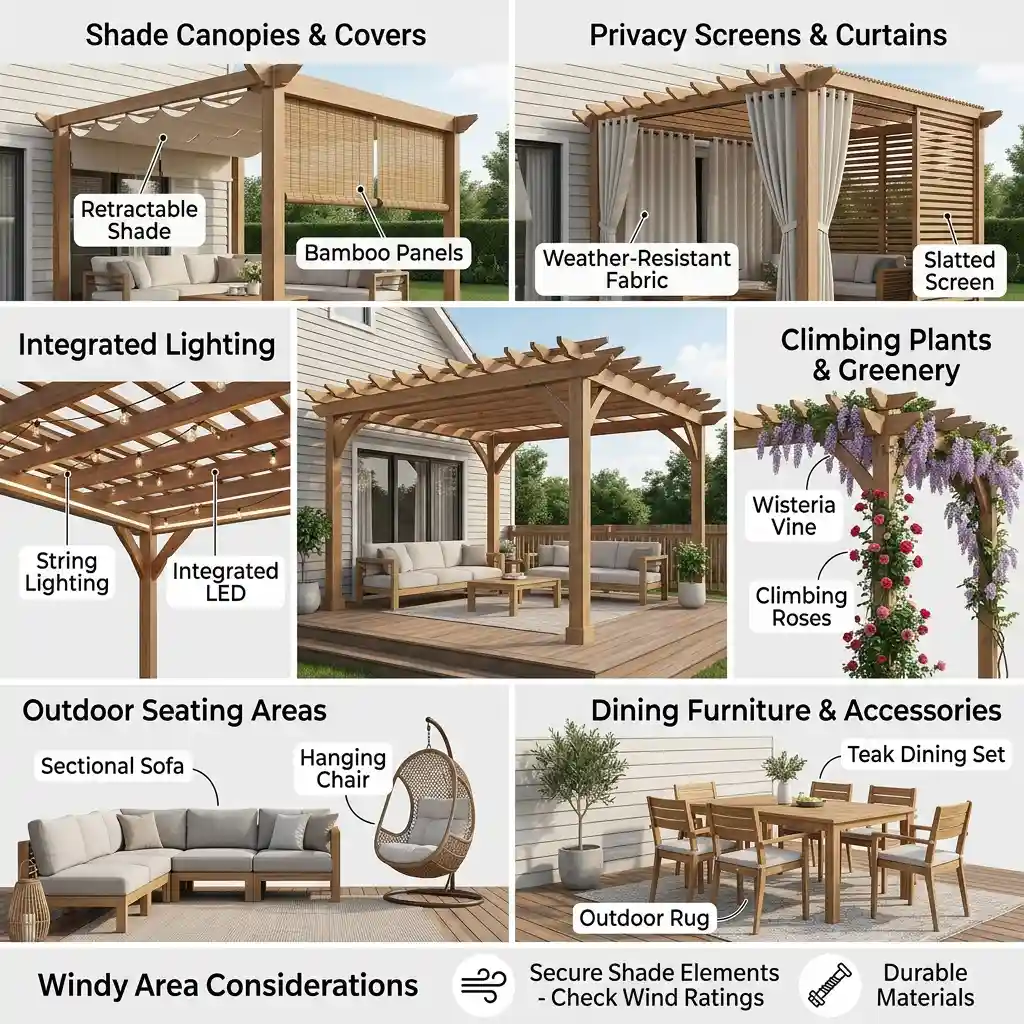
Once the structure is properly installed, you can customize the space around how you use your deck.
Popular additions include:
- Shade canopies
- Outdoor curtains or privacy screens
- String or integrated lighting
- Climbing plants
- Outdoor seating
- Dining furniture
Choose accessories according to the conditions of your location. In windy areas, avoid treating decorative shade elements as purely aesthetic additions; their material, anchoring, and wind exposure can affect the overall setup.[1]
Final Takeaway
Adding a pergola to an existing deck is possible, but the project should start with structural planning rather than product selection.
First, inspect the existing deck and identify suitable support points. Then choose whether to connect the pergola to reinforced deck framing or use an independent footing system. After installation, check the structural connections, stability, weather exposure, and local requirements.
Once the structure is properly supported, you can choose the shade, lighting, privacy features, and furniture that make the pergola work for your outdoor space.
FAQs
1. Can you put a pergola on any existing deck?
No. The deck must have suitable structural capacity and appropriate support points for the additional structure. Older, damaged, elevated, or structurally uncertain decks may require reinforcement or professional assessment.
2. Can you attach a pergola directly to deck boards?
The pergola should not rely on the decking boards alone. Its posts need to transfer loads into suitable structural framing or an appropriately designed independent footing system.
3. Does an existing deck need reinforcement for a pergola?
Not always. Reinforcement may be necessary when the existing framing cannot provide suitable support at the planned post locations. The requirement depends on the deck construction and pergola design.
4. Is it better to use a pergola kit or build one from scratch?
A kit is generally more convenient for standardized installation, while a custom build provides greater flexibility over dimensions and materials. The better option depends on your installation experience and customization needs.
5. Do you need a permit to add a pergola to an existing deck?
It depends on your location and project details. Check local planning and building requirements before construction, especially if the pergola is large, elevated, close to a boundary, or structurally attached to the existing deck.
References
[1] Outsunny, Shade Solutions for Windy Areas: How to Choose Wind-Resistant Outdoor Shade.

Outdoor ideas, buying guidance, and category inspiration for shoppers comparing official Outsunny products on Aosom.